| |
Object Properties
Tool Set: Select which set of user-defined tools
is used with this object (Pro, Enterprise and Client
Editions only).
Name: The name of the object.
The drop down
list next to this is used to set the relative position
of the label. The choices are NSEW (as in the positions
on a compass), C for centred and " " for hidden. A "*"
is shown for labels which have been dragged to other
positions.
The Lock button locks the label position
such that it cannot be dragged from it's current
position relative to the parent object.
Address:
Specifies the IP address used by the programmable
function buttons.
Object Type: Name of the object as shown in the
Object Library.
X/Y Scale: Used to enlarge or reduce the
Bitmap.
Layer: Sets the order which the object is drawn.
The background and grid lines are drawn first followed
by objects in layers 5 to 3, then links are drawn and
then objects in layers 2 to 0 are uppermost. The "Send
to Back" and "Bring to Front" buttons on the toolbar
moves the selected objects through the different layers.
Rotate: Rotate object angle in degrees (Pro,
Enterprise and Client Editions only).
Float Text: Text which appears when the cursor
hovers over an object.
Misc > Hyperlink:
Diagrams may be linked together such that one or more
special objects in a diagram provide a link to other
diagram files. To follow a link to another diagram,
right click the object and select "Goto next diagram".
Configure an object to be a link to another diagram in
the Object Properties form using the following settings:
Link?: This tick box enables the "Goto next diagram"
option when this object is right clicked.
Location: Filename of next diagram (include
.ndg extension).
Seek: Some text to seek when the next diagram
is loaded.
Use bookmark: Completes the Location and Seek
fields with the last bookmarked location (Edit >
bookmark).
|
 |
Drag And Drop Method For Linking Diagrams
Another way to create a link to a diagram is to drag and drop
the .ndg file you want to link to on to the canvas of the
current diagram. This adds an object which acts as the link as
stated above.
The Links Table

| |
The links table shows a table of all the connections
to an object.
Clicking any column heading sorts the table by that
particular column.
An IP Address, Hostname and Comment may be entered
for each end of each link.
The  columns are drop-down boxes from which you choose the
display position relative the object for the IP
Address or Hostname.
The "Add to table"/ "Remove from table" buttons are
used to transfer or remove the object's principal IP
address and Hostname to/from the table. To enable this
button, you must highlight one of the rows by clicking
column 0.
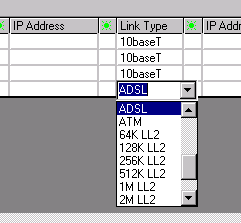
Changing Link Types
To change a link type for any of the connections,
click a box in the Link Type column and choose the new
link style from the drop down list.
|

|
|


